ADVERTISEMENT
-
Mix the Dry Ingredients: Take a very large mixing bowl and add your three cups of flour along with the salt and the yeast. Use a whisk or a large spoon to stir these together so the yeast and salt are spread evenly throughout the flour.
-
Add the Flavors: Put your chopped fresh rosemary and the minced garlic into the flour mixture. Stir again so that the herbs and garlic are not all in one clump because you want a bit of flavor in every single bite of the bread.
-
Incorporate the Water: Pour the warm water into the bowl with the dry ingredients. Use a sturdy spoon or even your clean hands to mix everything together until all the flour is wet and you have a shaggy messy looking ball of dough. You do not need to make it smooth or pretty at this stage.
-
The First Rise: Cover the bowl tightly with plastic wrap or a clean damp kitchen towel to keep the moisture inside. Place the bowl in a warm spot in your kitchen where it will not be disturbed. Let it sit there for at least 12 hours though 18 hours is even better if you have the time. You will know it is ready when the dough has doubled in size and has lots of little bubbles on the surface.
-
Shape the Dough: Sprinkle a generous amount of flour onto a clean counter or a large cutting board. Gently scrape the sticky dough out of the bowl and onto the floured surface. Fold the edges of the dough toward the center a few times to form a round shape. Do not press too hard because you want to keep those air bubbles inside.
-
The Second Rise: Place the shaped dough onto a piece of parchment paper and cover it again with your towel. Let it rest and rise for another 30 to 60 minutes. While this is happening put a heavy pot like a Dutch oven into your oven and preheat it to 450 degrees Fahrenheit.
-
Bake the Bread: Carefully take the hot pot out of the oven using thick mitts. Lift the parchment paper with the dough on it and drop it into the hot pot. Put the lid on the pot and bake it for 30 minutes. The lid keeps the steam inside which helps the bread rise and creates a great crust.
-
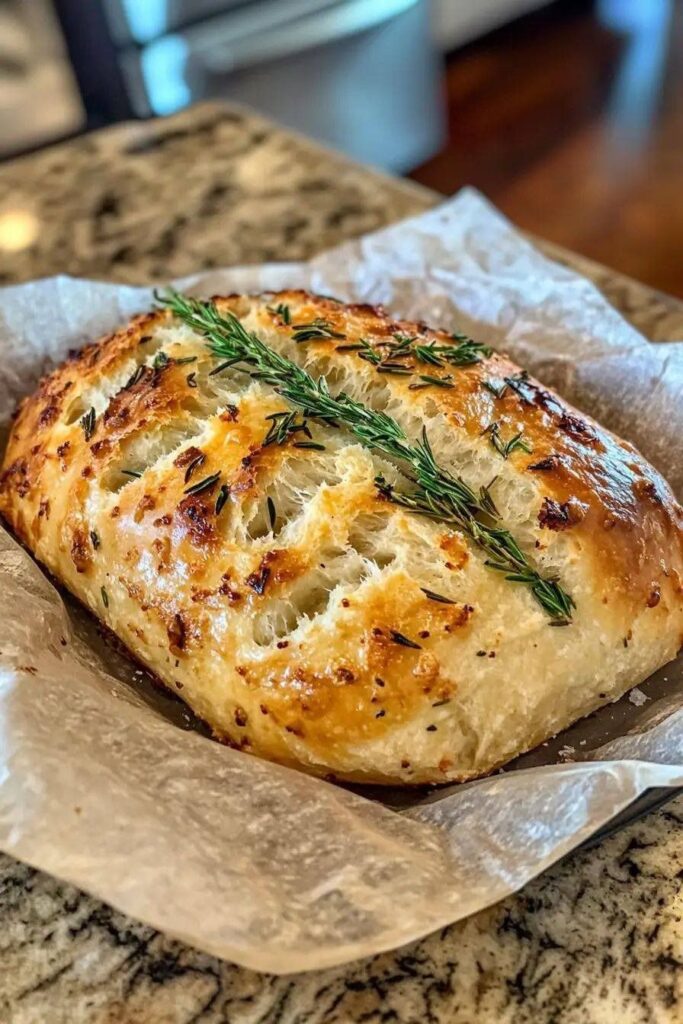
Brown the Crust: After 30 minutes remove the lid from the pot. You will see that the bread is pale but fully shaped. Continue baking without the lid for another 10 to 15 minutes until the top is a deep golden brown and sounds hollow when you tap on it.
-
Cooling Time: Remove the bread from the pot and place it on a wire rack to cool down. It is very tempting to cut it right away but you should wait at least 30 minutes so the inside finishes cooking and the texture stays perfect.
Why This Recipe Is Special
This recipe is special because it brings the ancient art of bread making into the modern world in a way that is accessible to everyone regardless of their kitchen experience. The health benefits of making your own bread are significant because you are avoiding the high amounts of sugar and strange oils found in many commercial brands. Garlic is well known for supporting a healthy heart and rosemary has been linked to better memory and focus so you are getting more than just empty calories. The taste is superior to store bought bread because the long rise time allows the natural flavors of the grain to develop fully which creates a complex and savory profile. Additionally the no knead method is inclusive for people who might have trouble with their hands or wrists and cannot perform the heavy physical labor of traditional kneading. It is a inclusive way to enjoy the best food life has to offer.
Extra Tips for Better Taste
If you want to take your bread to the next level try adding a half cup of shredded parmesan cheese to the dough during the mixing stage for a salty kick. You can also brush the top of the warm loaf with a little bit of melted butter and a sprinkle of coarse sea salt right after it comes out of the oven to make the crust shine and taste even richer. If you prefer a more rustic look you can use a sharp knife to cut a shallow cross on the top of the dough before you put it in the oven which helps the bread expand. For those who like a bit of spice adding a pinch of red pepper flakes to the flour provides a nice background heat that pairs perfectly with the garlic. Always try to use fresh rosemary if possible as the dried version can sometimes feel a bit woody in a soft loaf of bread.
Final Thoughts
Starting your day with the smell of fresh rosemary and garlic bread is a luxury that everyone deserves to experience at least once. This recipe proves that you do not need to be a master baker to create something beautiful and delicious for your table. I hope this loaf brings a sense of peace to your kitchen and plenty of joy to your taste buds as you share it with your favorite people. Remember that baking is a journey and each loaf you make will be a little bit better than the last one so keep practicing and enjoying the process.
ADVERTISEMENT
Nutrition Details
The following table provides an estimate of the nutritional content for one slice of this bread assuming the loaf is cut into 12 equal portions.
| Nutrient Type | Amount Per Serving |
| Calories | 145 calories |
| Total Fat | 1 gram |
| Saturated Fat | 0 grams |
| Cholesterol | 0 milligrams |
| Sodium | 290 milligrams |
| Total Carbohydrates | 28 grams |
| Dietary Fiber | 1 gram |
| Sugars | 0 grams |
| Protein | 4 grams |
| Vitamin C | 2 percent of daily value |
| Iron | 8 percent of daily value |
Disclaimer
Please keep in mind that every person has a different body and your nutritional needs might be different based on your age or activity level. This information is meant to be a general guide and is not intended to replace advice from a medical professional or a licensed nutritionist. The results of this recipe can vary based on the type of flour you choose and the temperature of your kitchen. If you have any allergies or specific health conditions please consult with a doctor before making changes to your diet or trying new recipes. Always ensure your cooking environment is safe and follow all oven safety instructions to prevent accidents.
ADVERTISEMENT