ADVERTISEMENT
Preparing the Crust Layer
The first thing you want to do is preheat your oven to three hundred and fifty degrees so it is ready for your crust when you are finished mixing. Take a square baking pan and line it with parchment paper so that the bars do not stick and you can easily lift them out later when they are finished cooling. In a medium sized mixing bowl combine your two cups of fine almond flour with the powdered sweetener and a pinch of salt. Pour in your melted butter and the vanilla extract then use a large spoon or your hands to mix everything together until it looks like wet sand. Press this mixture firmly into the bottom of your prepared pan making sure that it is even across the whole surface so the bars are the same thickness. Place the pan in the oven and bake the crust for about ten to twelve minutes or until the edges start to turn a very light golden brown color. Once it is done take it out and let it cool completely on the counter because you do not want the next layer to melt into a hot crust.
Making the Crunchy Caramel Middle
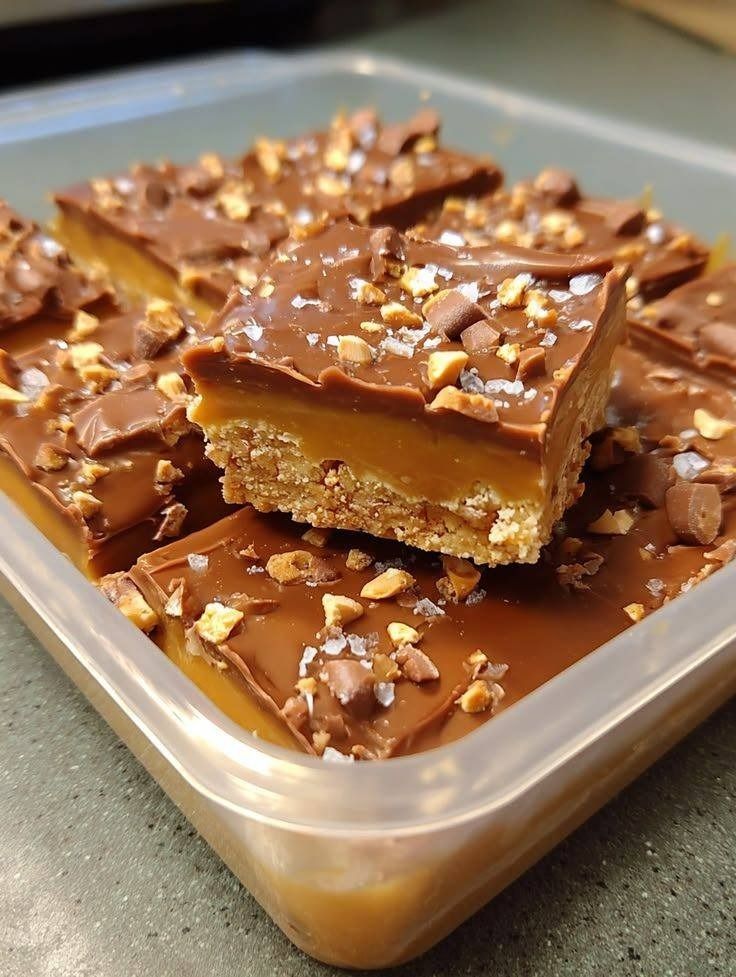
While your crust is cooling down you can start working on the heart of the recipe which is the peanut butter caramel layer. In a small saucepan over medium heat combine your natural peanut butter with the sugar free syrup and the heavy whipping cream. Stir the mixture constantly as it starts to warm up so that nothing burns on the bottom of the pan and everything becomes very smooth. Once the mixture begins to bubble slightly turn the heat down to low and keep stirring for about three or four minutes until it starts to thicken up into a deep caramel color. Remove the pan from the heat and stir in your sea salt and the crushed sugar free cereal which will provide that signature Butterfinger crunch that we all love so much. Pour this warm and sticky mixture over your cooled crust and use a spatula to spread it out to the very edges of the pan. Place the whole pan into the refrigerator for at least one hour so that the caramel can set and become firm before you add the final layer of chocolate.
Adding the Chocolate Topping
After the middle layer has had plenty of time to firm up in the fridge you are ready to add the beautiful chocolate finish to your bars. Take a microwave safe bowl and add your sugar free chocolate chips along with the two tablespoons of coconut oil which will give the chocolate a nice shine and a softer bite. Heat the chocolate in thirty second intervals and stir it well each time until it is completely melted and looks very glossy. If you prefer to use a stove you can use a double boiler method to melt the chocolate slowly and gently so it does not seize up or get grainy. Once the chocolate is ready pour it over the top of the chilled peanut butter layer and tilt the pan back and forth to let it cover everything evenly. You can use a knife to smooth it out if needed but usually it flows quite well on its own. If you want to make them look fancy you can sprinkle a little bit of extra sea salt on top of the wet chocolate before it sets.
ADVERTISEMENT
Cooling and Cutting the Bars
Put the pan back into the refrigerator and let it sit for another two hours or even overnight if you have the patience to wait that long. It is very important that the bars are completely cold and firm before you try to cut them or else the layers might slide around and create a bit of a mess. When you are ready to serve them lift the parchment paper out of the pan and place the large block on a cutting board. Use a very sharp knife that has been dipped in hot water and wiped dry to make clean cuts through the chocolate and the crunchy layers. You can cut them into small squares or long bars depending on how much of a treat you want at one time. Store any leftovers in an airtight container in the fridge or the freezer to keep them crunchy and fresh for several weeks. These bars taste even better when they are cold so do not be afraid to eat them straight from the freezer for a very refreshing and satisfying snack.
Why This Recipe Is Special
This recipe is special because it solves the problem of finding a truly crunchy keto snack that does not rely on chemicals or expensive store bought ingredients. Most people struggle with the texture of low carb baking but this method uses the natural properties of peanut butter and sugar free syrups to create a sensation that is very close to real candy. It is also a very healthy choice compared to traditional bars because it is packed with healthy fats from the nuts and the butter which help keep you full for a longer period of time. You will find that you only need one small piece to feel completely satisfied which prevents overeating and helps you stay within your calorie goals for the day. The use of almond flour instead of wheat flour means that this recipe is naturally gluten free which is a huge benefit for people with sensitivities or inflammation issues. Furthermore the dark chocolate used on top provides antioxidants that are good for your heart and your mood without the spike in insulin that sugar usually causes. It is a thoughtful recipe that respects your health while also honoring your cravings for something truly indulgent and delicious.
Extra Tips for Better Taste
See more on the next page to continue reading →
ADVERTISEMENT
ADVERTISEMENT