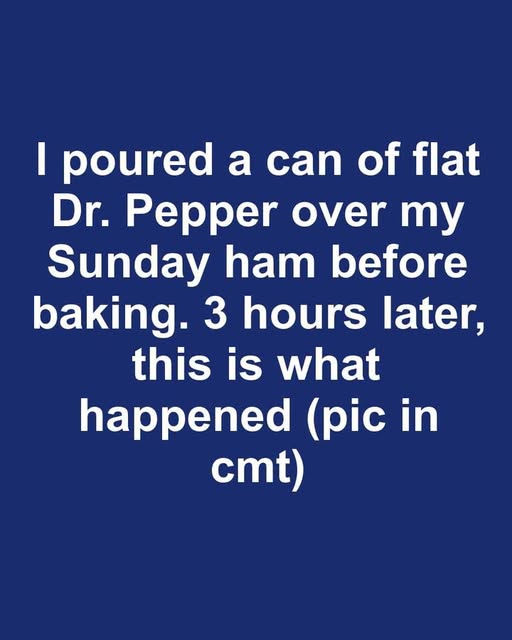
When it comes to Sunday dinners, ham is often a staple centerpiece, loved for its succulent texture and sweet, savory glaze. Traditionally, preparing a ham involves a meticulous process of scoring, seasoning, and basting with a carefully crafted glaze. However, in the spirit of culinary curiosity, I decided to venture off the beaten path and try something unconventional: using flat Dr. Pepper as a glaze substitute for my Sunday ham.
The idea of using soda as a meat marinade isn’t entirely new, but it certainly raises eyebrows. Dr. Pepper, with its unique blend of 23 flavors, seemed like a bold choice. My curiosity was piqued. Would the soda’s sweetness and spiciness enhance the ham’s flavor, or would it turn into a sticky, unappealing mess? Armed with a can of flat Dr. Pepper and a sense of adventure, I embarked on this experimental journey to find out.
1. Why I Reached For a Can of Flat Dr Pepper Instead of a Traditional Ham Glaze
The reason I chose flat Dr. Pepper to glaze my ham was twofold: its unique flavor profile and the convenience it offered. A traditional ham glaze usually requires a mix of brown sugar, honey, mustard, and various spices. These ingredients create a sweet, tangy, and aromatic coating. However, Dr. Pepper’s blend of 23 flavors, including notes of cherry, licorice, and amaretto, promised a similar complexity without the hassle of mixing multiple ingredients.
Additionally, I had a can of Dr. Pepper that had gone flat in the fridge. Instead of wasting it, I decided to experiment and see if it could serve as a viable glaze. The soda’s high sugar content suggested it would caramelize nicely, while its acidity might tenderize the meat. It seemed like a win-win situation that was worth a try.
2. Prepping the Sunday Ham: Cut, Score, and Seasoning Before the Soda Pour
Before applying the Dr. Pepper, I prepared the ham by scoring it in a diamond pattern, a technique that helps the glaze penetrate deeper into the meat. Using a sharp knife, I made shallow cuts about 1/4 inch deep across the surface of the ham. This not only allowed the soda to seep into the meat but also created a visually appealing pattern once baked.
For seasoning, I opted for a simple rub of salt, pepper, and a hint of garlic powder to complement the flavors of the Dr. Pepper. I gently massaged the seasoning into the scored surface, ensuring it reached every crevice. This step was crucial in balancing the sweetness of the soda with savory notes.
3. Pouring the Flat Dr Pepper: How Much I Used and Exactly How I Applied It
I used a standard 12-ounce can of flat Dr. Pepper for my glaze. After seasoning the ham, I slowly poured the soda over the top, allowing it to cascade down the sides and pool at the bottom of the baking dish. This method ensured that the entire surface of the ham was coated.
To enhance the caramelization process, I reserved about 2 ounces of the soda to baste the ham halfway through the baking time. This additional step aimed to build layers of flavor and ensure a rich, sticky glaze that adhered well to the meat.